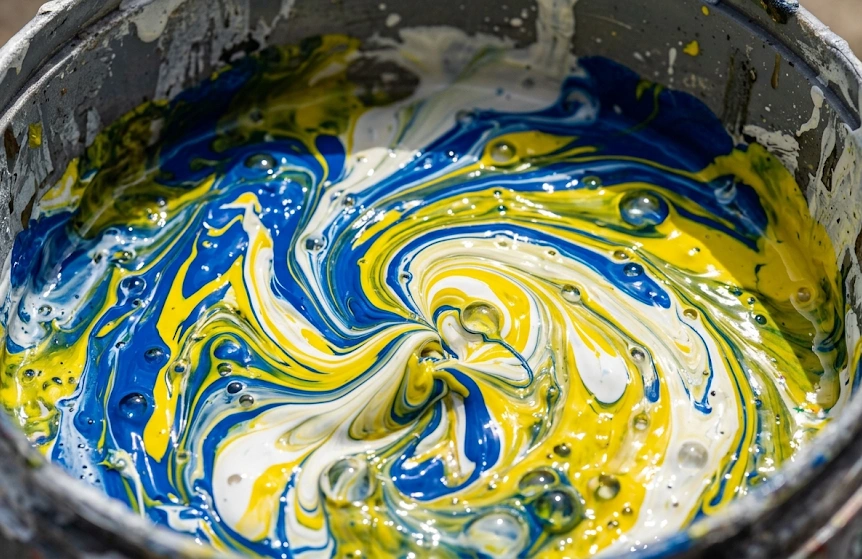
Dealing with uneven paint mixing is one of the most frustrating challenges for both DIY enthusiasts and professional painters. You open a can or bucket, start stirring, and instead of a smooth, uniform liquid, you are left with stubborn clumps, floating colors, or a watery mess sitting on top of thick sludge.
If you apply poorly mixed coatings to your walls or products, you will inevitably face color discrepancies, poor adhesion, and an amateur-looking finish. But don’t worry! In this guide, we will explore exactly why your coatings refuse to blend and share our top secrets to achieve that perfect, silky consistency every single time.
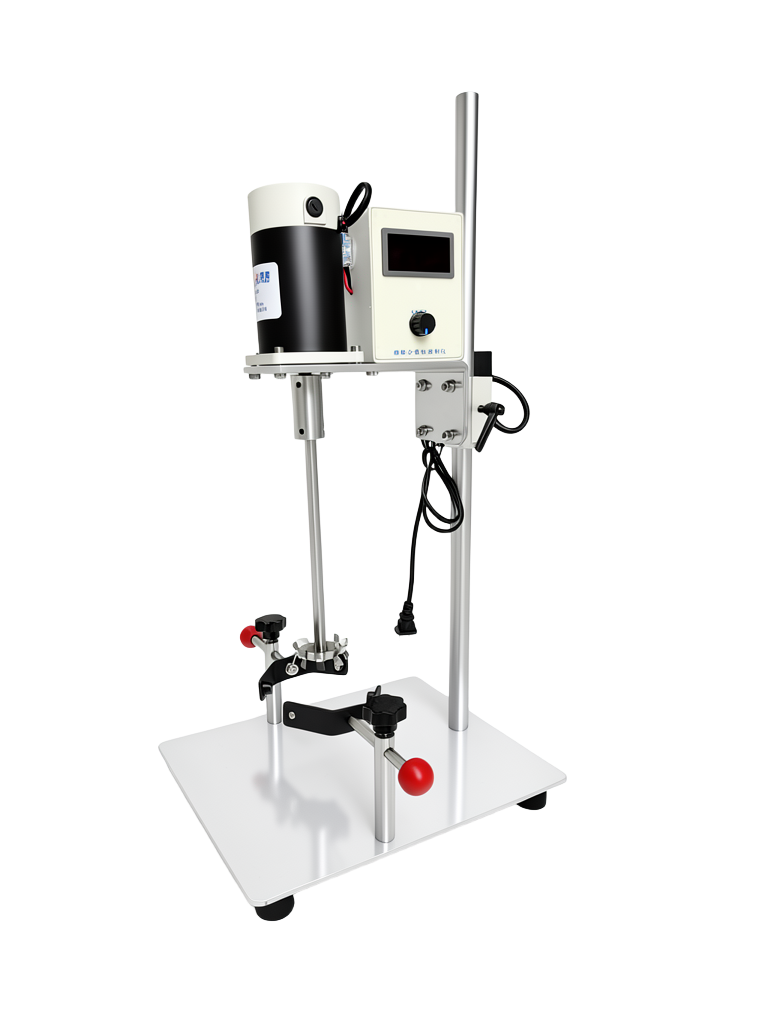
Often, mastering this consistency comes down to pairing your technique with the right equipment. If you are tired of manual stirring and want to upgrade your workflow, we highly recommend reading this comprehensive guide to selecting medium and small dispersers. To learn more about how to improve your paint mixing efficiency, check out this blog post: Disperser Cowles Guide
Why Does Uneven Paint Mixing Happen?
Before we dive into the solutions, it is crucial to understand the root causes of uneven paint mixing. Coatings are complex chemical formulations consisting of resins, pigments, solvents, and additives. When they sit idle or are handled incorrectly, things go wrong:
- Prolonged Storage: Heavy pigments naturally settle at the bottom of the container over time, leaving a thin layer of resin and solvent at the top.
- Incorrect Thinning: Dumping a large amount of water or solvent into the bucket all at once shocks the formula, causing immediate separation.
- Inadequate Tools: A flimsy wooden stick is completely useless for anything larger than a quart. High-viscosity materials require serious mechanical shear to blend properly.
7 Incredible Fixes for Uneven Paint Mixing
If you are staring at a stubbornly separated bucket, try these highly effective methods to save your material and get back to work.
- Scrape the Bottom Thoroughly: Before you even begin to spin a mixer, take a stiff metal putty knife or a flat, rigid paddle. Drive it all the way to the bottom corners of the bucket to physically dislodge the hard-packed sediment. If you skip this step, no amount of spinning will help.
- Add Thinners Gradually: If your material is too thick, never pour in your solvent or water all at once. Add it in very small increments (about 2-5% at a time), blend thoroughly, and check the consistency before adding more.
- Upgrade to Professional Equipment: This is the ultimate game-changer. If you are handling large volumes or industrial coatings, standard drill attachments will just whip air into your mixture, creating bubbles. You need professional-grade sheer force. We highly recommend checking out high-quality lab mixers and dispersers. These professional machines break down pigment clumps at a microscopic level, completely eliminating uneven paint mixing issues and ensuring a flawless, mirror-like finish.
- Try the “Boxing” Technique: If you are using multiple cans of the same color for a large room, pour them all into a single, larger bucket and mix them together. This guarantees absolute color uniformity across the entire project.
- Filter Before You Spray: After you have agitated the liquid, pour it through a fine-mesh strainer (around 190 to 200 microns). This will catch any tiny, unmixed dried flakes or skin that could ruin your final coat or clog your spray gun.
- Let the Mixture Rest: High-speed agitation introduces micro-bubbles. Let your bucket sit peacefully for 10 to 15 minutes before applying. This allows the trapped air to escape to the surface and pop.
- Maintain Optimal Temperature: Cold temperatures drastically increase viscosity, making blending nearly impossible. Always store and prep your materials at room temperature (around 70°F or 21°C) for the best results.
Frequently Asked Questions (FAQ)
Q: How can I tell if my issue with uneven paint mixing is fully resolved?
A: Lift your stir stick out of the bucket and observe how the liquid runs off. It should fall in a smooth, continuous, and completely solid-colored ribbon. If you see streaks of darker color, clear liquids, or lumps, you need to keep going.
Q: I accidentally added too much water, can I fix it?
A: Over-thinning is tough to reverse because it destroys the covering power. The only reliable solution is to slowly blend in more un-thinned, raw product of the exact same color to balance the viscosity.
Q: Do metallic finishes require special attention?
A: Absolutely. Metallic flakes are notoriously heavy and drop out of suspension rapidly. You must agitate these products continuously during application. If you don’t, your project will end up with light patches at the start and heavily concentrated sparkles at the end.
References & Further Reading
- Wikipedia: Paint Composition and Manufacturing
- American Coatings Association: Industry Standards for Coating Application
- ScienceDirect: Principles of Dispersion and High-Shear Mixing in Chemical Engineering.